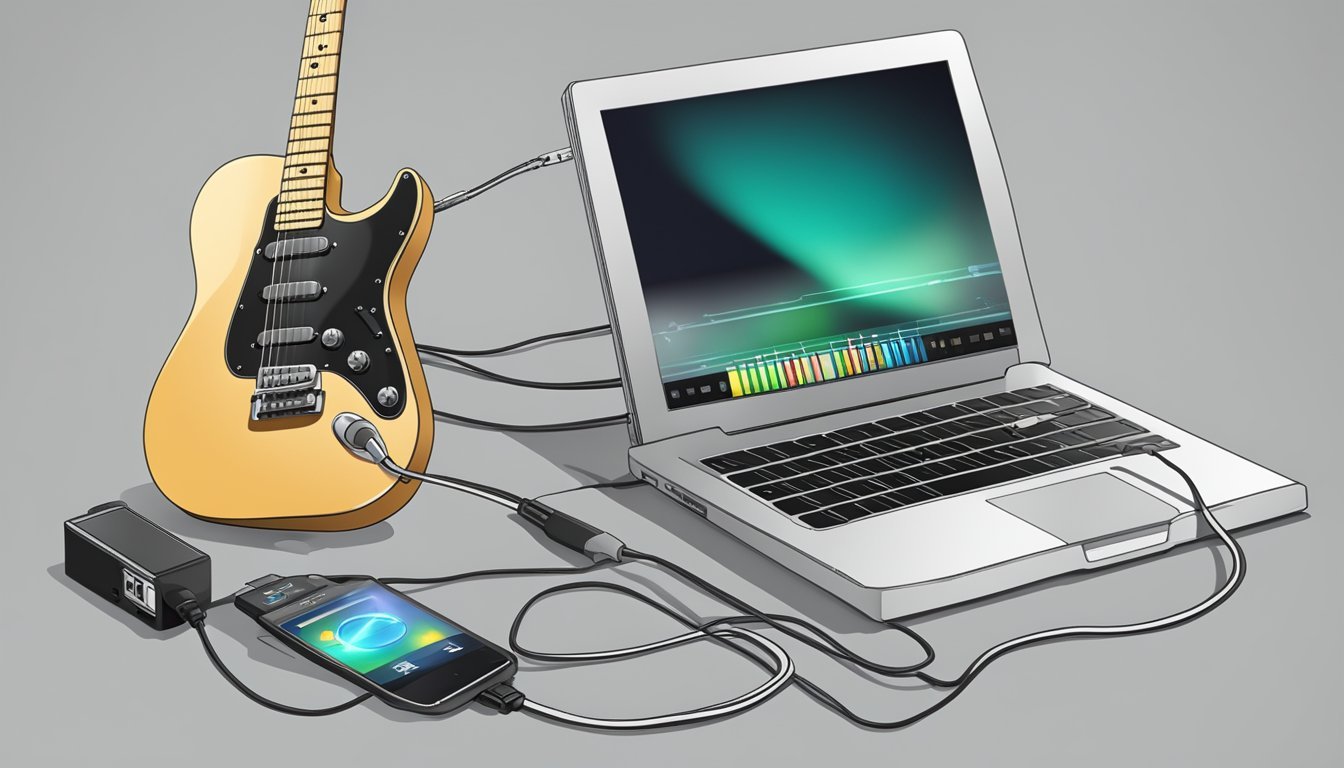
Connecting your guitar to a computer opens up a world of possibilities for recording, editing, and enhancing your sound.
With the right tools, you can turn your computer into a powerful music studio.

You can use methods like audio interfaces, USB cables, or even software that mimics traditional amplifiers to get started.
Whether you want to record your latest song, practice with digital effects, or share your music online, connecting your guitar can simplify the process.
It’s easier than you think and doesn’t require advanced technical skills.
Just follow a few simple steps, and you’ll be ready to create and customize your sound like a pro.
So, if you’re ready to take your music to the next level, keep reading to learn how to connect your guitar to your computer and explore all the exciting options available to you.
Once you’ve successfully connected your guitar to your computer, you’ll be able to access a plethora of software for recording, mixing, and even adding effects to your music.
But before you dive into this technological adventure, it’s essential to ensure your guitar is in top shape; learning how to restring your guitar can significantly improve your sound quality and playability.
So, let’s unravel the first steps to both connecting your gear and enhancing your instrument’s performance.
Key Takeaways
- You can connect your guitar using various methods like audio interfaces or USB.
- Recording and editing your music becomes simple with computer software.
- Digital effects can significantly enhance your sound and creativity.
Getting Started
Connecting your guitar to your computer is easier than you might think.
With the right equipment and a little setup, you can start making music right away.
This section will guide you through choosing your gear, setting up your audio interface, and understanding your computer’s specs and connections.
Choosing Your Equipment
First, you need to pick the right equipment.
The two main items you’ll need are an audio interface and a guitar cable.
An audio interface allows you to connect your guitar to your computer, converting the guitar’s sound into a digital signal.
Look for a USB audio interface that is compatible with your computer’s operating system.
Popular options include Focusrite Scarlett, Behringer UM2, and PreSonus AudioBox.
Make sure the interface has at least one input for your guitar.
Next, get a good quality guitar cable.
This is usually a standard quarter-inch jack cable.
Avoid cheap cables; they can affect your sound quality.
Once you have these items, you are ready to start setting everything up.
Setting Up the Audio Interface
Now it’s time to set up your audio interface.
Start by connecting the interface to your computer using a USB cable.
Most interfaces will plug directly into a USB port, but ensure you have the correct cable and port type.
After that, plug your guitar into the audio interface using your guitar cable.
Look for the input labeled “Instrument” on the interface; this is where your guitar will connect.
Next, you might need to install any drivers provided by the manufacturer.
This helps your computer recognize the interface.
Once everything is connected, open your music software, and your interface should show up as an audio input option.
Understanding Computer Specs and Connections
When connecting your guitar, knowing your computer’s specs is essential.
Make sure your computer has enough processing power and RAM to handle audio recording and effects playback.
Most modern computers should be fine, but it’s good to check.
You will also need to check the available USB ports.
Some older computers might have USB 2.0, while newer ones usually have USB 3.0, which offers faster data transfer.
Additionally, make sure your operating system supports the software you plan to use.
Most audio software will have information on compatibility.
Having a strong setup will make your recording experience much smoother.
Connecting the Guitar
Connecting your electric guitar to a computer opens up a world of music creation and learning.
You can use various methods, each with its own advantages.
Here’s how to connect using a USB interface, a standard guitar cable, or a multi-effects pedal.
Connecting with a USB Interface
A USB interface is one of the simplest ways to connect your guitar to the computer.
This device converts your guitar’s signal into digital audio.
-
Choose the Right Interface: Look for one with a Hi-Z input. This is essential for handling the high-impedance signal from your electric guitar.
-
Connection Steps:
- Plug your guitar into the interface using a standard ¼” jack cable.
- Connect the interface to your computer using a USB cable.
-
Configuration: Once connected, you may need to adjust your audio settings in your DAW (Digital Audio Workstation) for the best results.
Connecting Using a Standard Guitar Cable
If you don’t have a USB interface, you can still connect your guitar using a standard guitar cable.
This method often requires a few additional devices like an audio interface or an amp.
-
Setup:
- Connect your guitar to a guitar amp.
- From the amp, run an audio cable to your computer’s line-in jack.
-
Considerations: Make sure your computer’s audio input is set to receive audio from the line-in rather than the mic.
-
Sound Quality: This method can work, but the audio quality may not match that of a USB interface. You might introduce some noise, so check your connections.
Use of Multi-Effects Pedal or Amp Simulator
Using a multi-effects pedal or an amp simulator is another fun option.
These devices can add a variety of effects to your guitar sound.
-
Connection:
- Connect your electric guitar to the input of the multi-effects pedal using a ¼” jack cable.
- Use the output of the pedal to connect to your computer or audio interface.
-
Effects Management: You can tweak various effects like reverb, delay, or distortion before sending the sound to your computer.
-
Recording: Most amp simulators also allow you to record directly into a DAW. This gives you more control and flexibility while recording.
Recording and Editing
Once you’ve got your guitar connected to your computer, it’s time to dive into recording and editing.
This is where you can capture your sound and make it shine.
You’ll need to choose the right software, set your audio levels, and get familiar with recording and editing techniques.
Choosing a DAW
Your first step is selecting a Digital Audio Workstation (DAW).
Popular options include Pro Tools, GarageBand, and Ableton Live.
Each of them has unique features, so pick one that fits your style.
- Pro Tools is great for professional-grade recording.
- GarageBand is beginner-friendly and is ideal for quick setups.
- Ableton Live excels at live performances and loop-based compositions.
Explore trial versions to see which DAW you find easiest to use.
Setting Audio Levels and Preferences
Before you hit record, it’s important to set your audio levels.
Check your USB interface settings.
Make sure the gain isn’t too high to avoid distortion but also not too low so you don’t lose sound quality.
In your DAW, look for the audio settings menu.
Here, you can:
- Adjust your input levels
- Set your sample rate (usually 44.1 kHz is standard)
- Check for latency issues that can affect recording timing
It’s a good idea to monitor your levels while playing.
This way, you can tweak them as needed for the best sound.
Recording Your First Track
Now comes the exciting part: recording! Start by creating a new track in your DAW.
Select an audio track specifically for your guitar.
Arm the track for recording, which usually involves clicking a button marked “Record Enable.”
Once you’re ready, just hit the record button and play! Don’t worry about making it perfect on the first try.
You can always do multiple takes and choose the best one later.
Remember to keep an eye on your input levels as you record to ensure that you capture the best audio quality.
Editing Basics
After recording, it’s time to edit your track.
Editing allows you to refine your sound and make adjustments easily.
In your DAW, you can use tools like:
- Cut: Remove unwanted parts of your track.
- Fade In/Out: Smooth the beginning and end of your recording.
- Copy and Paste: Duplicate parts you like for a fuller arrangement.
Each DAW has editing functions that might look a little different, but the basics are generally the same.
Spend some time experimenting until you feel comfortable with the tools available.
Enhancing Your Sound
To get the best sound from your guitar when connected to your computer, you can use various tools and techniques.
This involves using guitar plugins, fine-tuning with EQ and effects, and mixing and mastering your tracks.
Using Guitar Plugins
Guitar plugins are essential for transforming your sound.
They mimic real amplifiers and effects.
Software like AmpliTube, Guitar Rig, and Bias FX offer realistic amp simulations.
You just need to connect your guitar to an audio interface, like the iRig HD 2, and choose your favorite plugin.
Start by selecting an amp model that matches your style—whether it’s clean, crunch, or heavy distortion.
Then, add effects like reverb or delay to enhance the sound.
Experiment with different combinations to discover what works best for you.
Fine-Tuning with EQ and Effects
Equalization (EQ) is crucial in shaping your guitar tone.
Most DAWs have built-in EQ tools.
Use these to cut or boost frequencies, making your sound clearer and more balanced.
You can also incorporate effects pedals in your setup.
Things like chorus, flange, and overdrive can layer additional richness to your sound.
Connect these pedals in your signal chain before it hits the interface to capture the full character of your guitar.
Always listen carefully as you tweak settings.
Subtle changes can make a world of difference.
Mixing and Mastering Your Tracks
Once you’ve recorded your guitar tracks, it’s time to mix and master.
Using a digital mixer allows you to adjust levels and panning.
This makes your guitar sit well in the overall mix.
Consider adding subtle compression to even out dynamic ranges.
This helps the guitar blend better with other instruments.
When you’re ready to master, use tools to enhance the final output’s loudness and clarity.
Always remember to keep your mixes balanced.
It ensures that your guitar shines through without overpowering other elements.
Frequently Asked Questions
Here are some common questions about connecting your guitar to a computer.
These tips will help you get started with setup and recording.
What’s the simplest way to plug my electric guitar into my PC?
The easiest way is to use an audio interface.
You can connect your guitar to the interface using a standard ¼” jack cable, then link the interface to your PC via USB.
This method provides a clear signal for recording.
Got any tips for recording my guitar on a computer using an amp?
Set up your amp normally and find a good mic to capture the sound.
Place the mic close to the amp speaker for the best results.
Connect the mic to your audio interface, and make sure to adjust the levels for clear audio.
What’s the deal with those audio interfaces for guitars, and do I need one?
Audio interfaces convert your guitar’s sound into a digital format for your PC.
They often provide better sound quality than just plugging your guitar directly into a computer.
If you want good recordings, getting an audio interface is a smart move.
Is there a way to play my guitar through PC software?
Yes, you can use amp modeling software to simulate guitar amps and effects.
Programs like AmpliTube or Guitar Rig allow you to play your guitar through your computer, giving you access to various sounds and effects.
How do I get my guitar tracks onto my computer without a mic?
You can connect your guitar directly to your audio interface and record that sound.
This method captures the clean sound of your guitar, ensuring high-quality recordings without needing a microphone.
Can you recommend good guitar recording software for my home setup?
For home recording, you should consider software like GarageBand, Reaper, or Ableton Live.
These programs have features for recording, editing, and mixing your guitar tracks.
They make it easy to use for musicians of all levels.